Roster Management: Roster Templates
Roster Management: Roster Templates
Contents
Creating a roster template
Roster templates allow businesses to create a roster template or a library of roster templates that will allow you to:
- Plan your resourcing requirements for certain events and/or projects in advance without affecting the standard roster;
- Build the basis of the roster specific to the roles required and then assign staff at a later stage;
- Cater for all different rostering scenarios applicable across the year in one location or all locations within a business;
- Apply any template to the roster on multiple occasions and from any specific date.
On the Roster page, you will see an icon for Roster Templates:

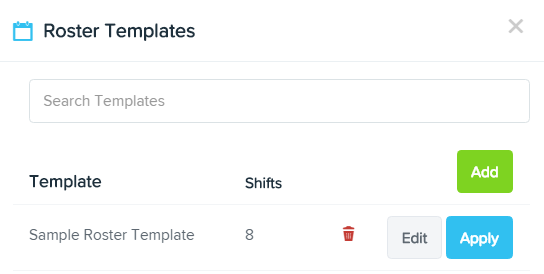
Clicking on this icon will enable the roster dialog box to pop-up, allowing view of your existing roster templates and allow you to add a new template.
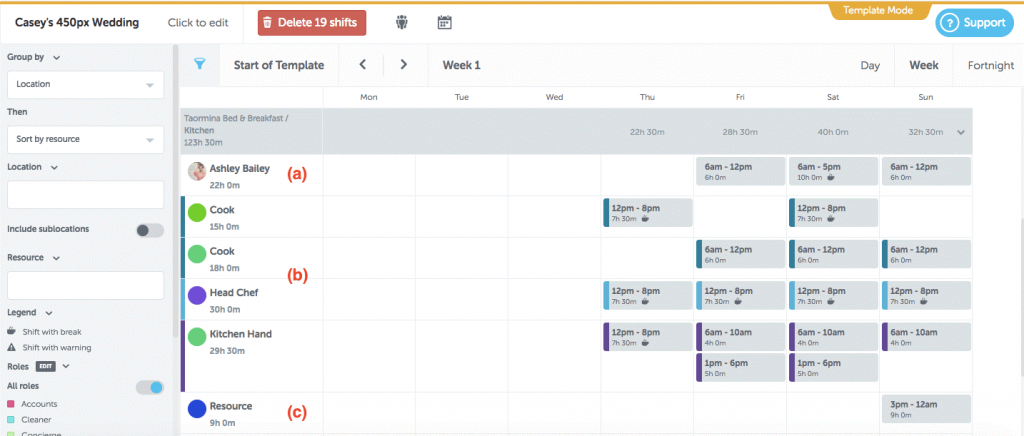
Click the ‘Add’ or “Edit’ button and the Roster Template page is displayed. The Template page is differentiated from the actual Roster page by a yellow banner at the top:

Once you click the ‘Add’ button, you can start filling in the roster template by adding as many rows as you need.
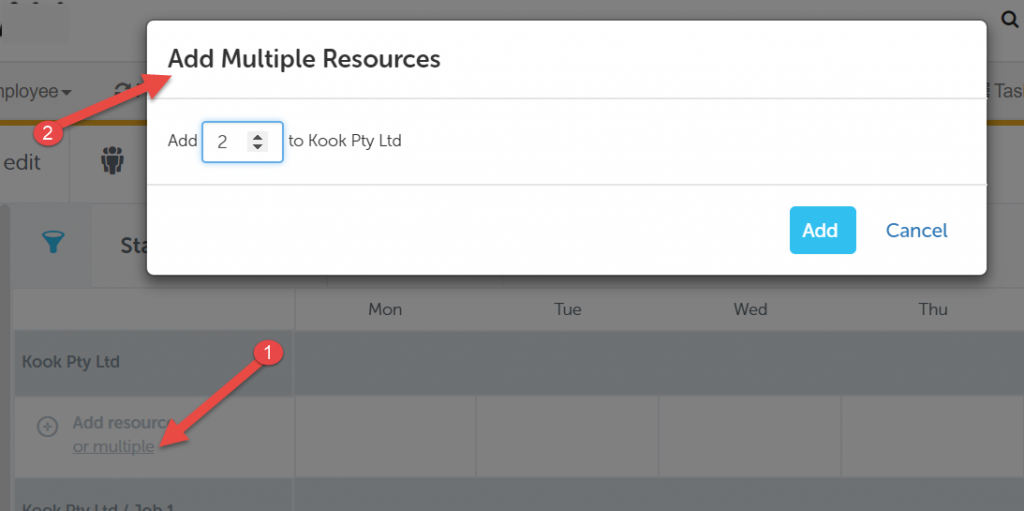
To add a single row, click the plus button to the left of the ‘Add Resource’ option as shown below:

To add multiple rows (you can add up to 99 rows at a time) to the roster template, select the ‘or multiple’ option below the ‘Add resource’ option as show below:
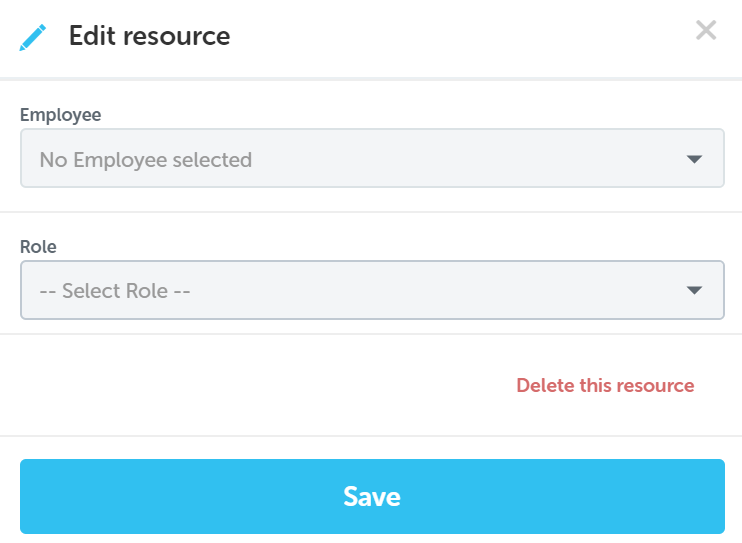
Once you have created single or multiple resource lines, you can then click on the ‘Resource’ box and assign each row to:
(a) a specific employee;
(b) a specific role; or
(c) a general placeholder.
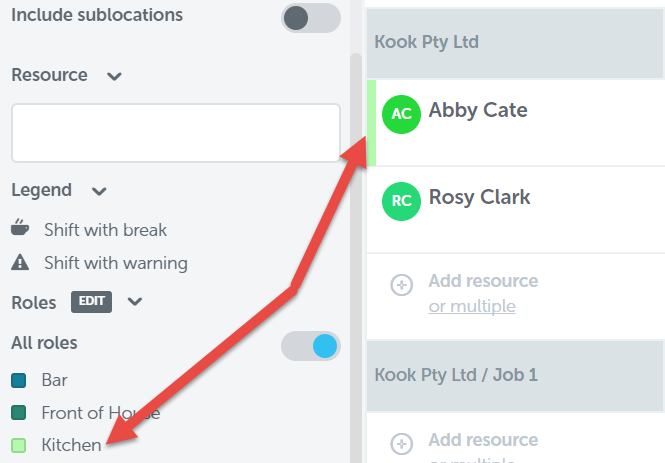
Additionally, you can choose to assign a role’s shifts to an employee by choosing from a list of ‘recommended’ and ‘other’ employees. Once assigned, the name of the role will be replaced by the employee’s name, however, you can use the colour key as a guide to know what role has been assigned:
Who can create roster templates?
- Users with ‘Manage Employee Rosters’ access IF the business setting allows managers to edit roster templates.
To activate the above setting, please email [email protected]
Applying a Roster Template
Once you have created a roster template you are then able to apply it to a roster and have the normal principles and functionality of rostering apply.
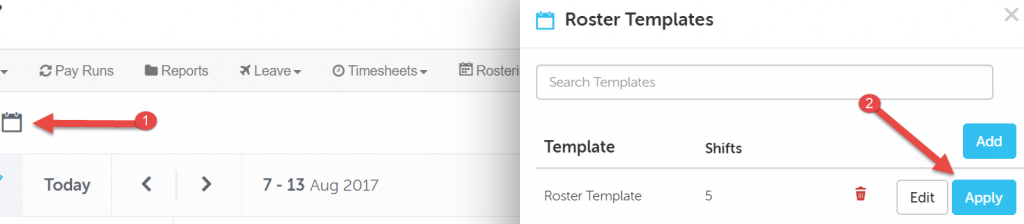
When wanting to apply the roster template from the Roster page, it’s simply a matter of clicking the ‘Roster Template’ icon and selecting ‘Apply’ on the appropriate template from your library of templates. You can also delete and edit your templates from here:
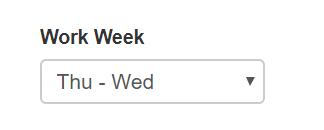
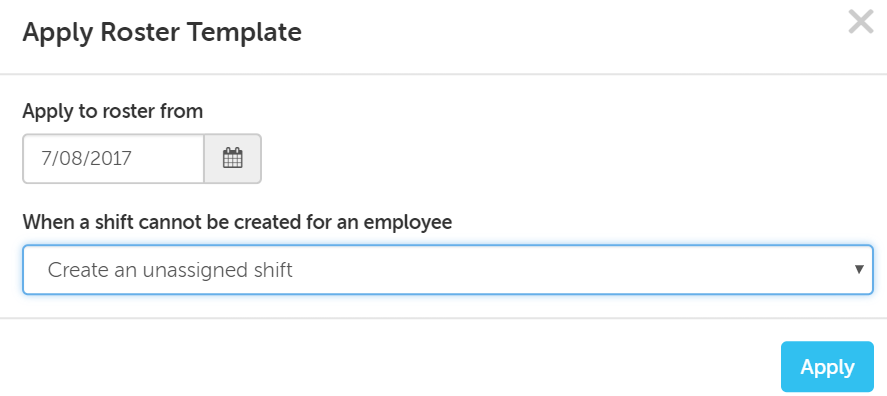
You will then be asked from what date to apply the roster template. You can apply this roster as far in advance as required. FYI, the start day of your roster is dictated by the settings on the Payroll Settings -> Details page. E.g. if the ‘Work Week’ has been configured to Thurs-Wed, the start day of your roster will be Thursday:

When applying the shift(s), if a shift cannot be created for an employee (because, for example, they are unavailable or have already been assigned a shift for that day) you have the option to:
- Create an unassigned shift
OR - Don’t create a shift
Unassigned shifts will appear on the bottom row of each location’s roster:
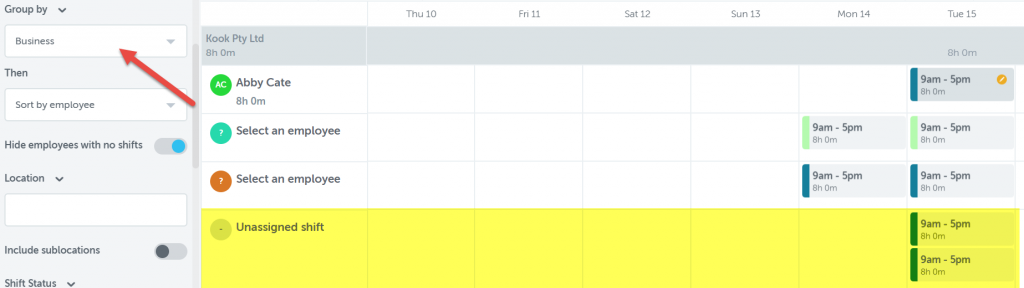
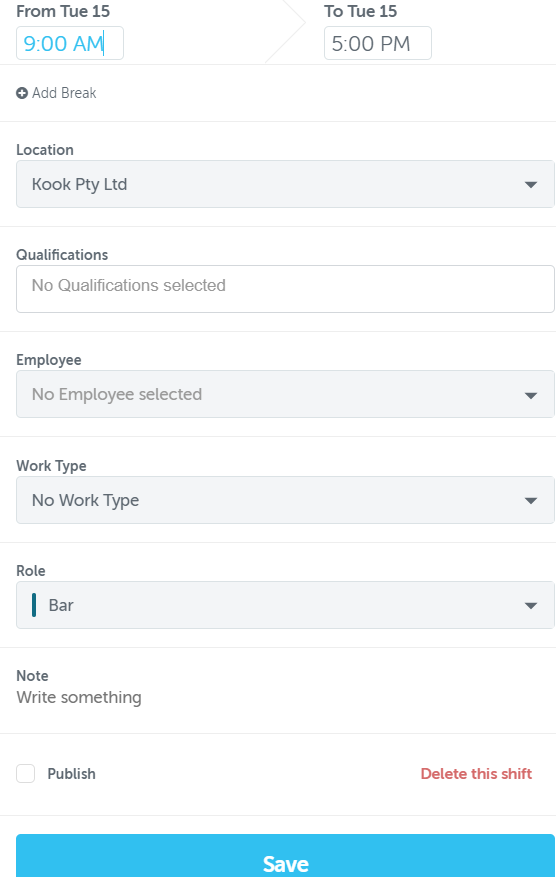
To assign these to specific employees, you can simply drag the shift to an employee, or click on the shift to bring up the normal ‘Create shift’ box that lets you select:
- Start/End time
- Location
- Qualifications
- Employee
- Work Type
- Role
If you have created a role or general placeholder for several shifts, you can assign these in the following ways:
- Click and hold to drag the shift to an employee
- Click on the shift itself to assign the individual shift to an employee
- Click on the ‘Select an employee’ or role placeholder name to assign all the shifts to a single employee:

The coloured stripe on the left-hand side of the shift tile corresponds to the role colour as indicated in the legend on the left menu panel:

This allows you to clearly identify what role needs to be filled and what employees have the capability when it comes to assigning the shift or row of shifts.
Now that the template is in the roster, you can delete shifts or create further shifts as needed. Changes that you make to shifts, after you have applied the roster template, will not affect the roster template.