Roster: Shift Management
Roster: Shift Management
Contents
This article will outline how to create, edit, copy and delete employee shifts.
Accessing the employee roster
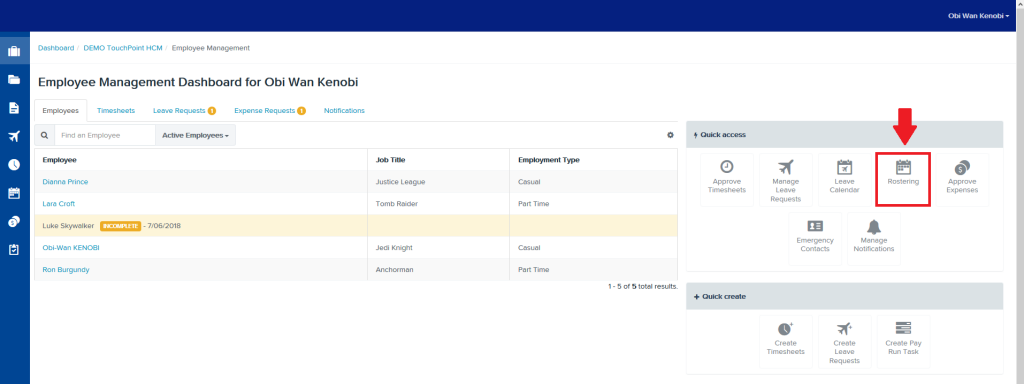
If you have permission to access the employee roster you can do so by clicking the Rostering icon on the management dashboard
Creating a shift
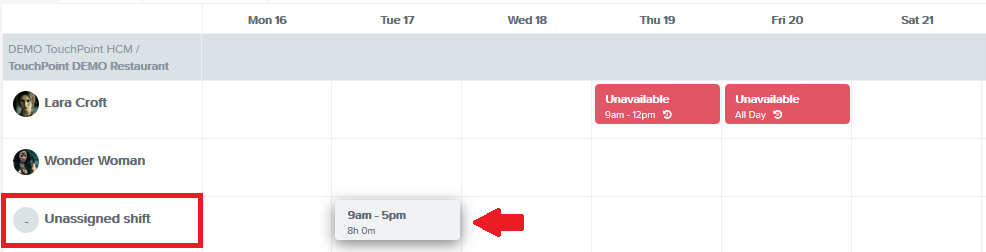
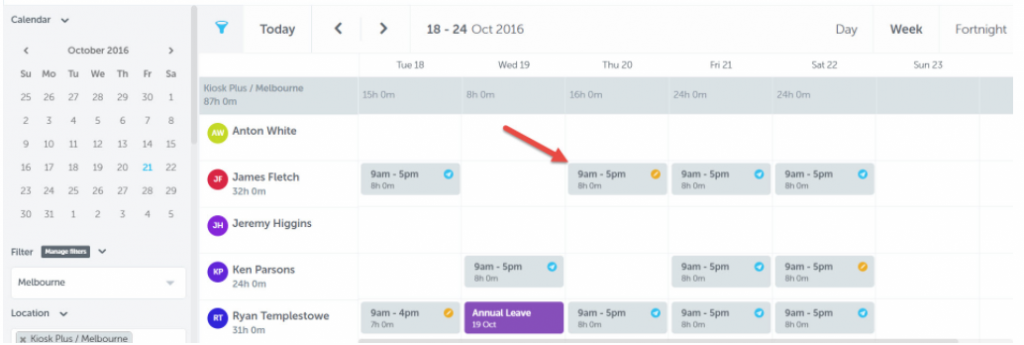
- From within the rostering screen, find the employee you want to create the shift for and then click on the shift panel that corresponds with the day you want to create the shift for

Alternately, you can select a shift panel on the Unassigned shift line, and add your employee by name when the shift editor appears (see below).
- Clicking on a shift panel will show the shift editor to the right of the screen
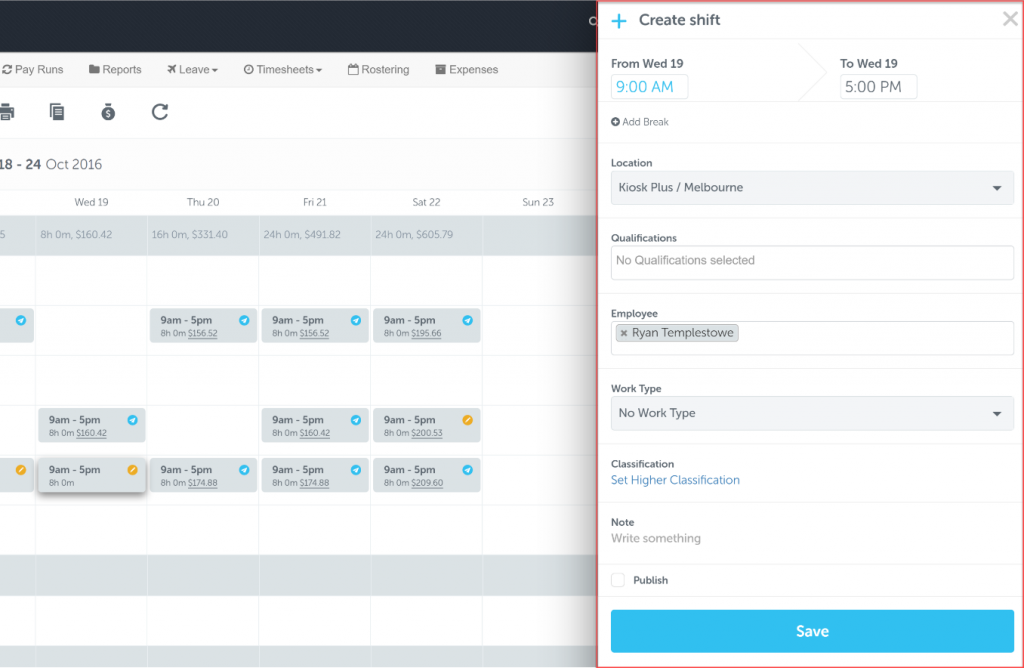
From the shift editor you can select the following details for the shift
- Start time
- End time
- Shift breaks (optional)
- Location
- Employee* (optional)
- Qualifications (optional. Will only show if qualifications have been setup for the business)
- Work Type (optional. Will only show if work types have been setup for the business)
- Classification (optional. Will only show if the employee is attached to an employee agreement which allows selection of higher classification)
- Notes (optional)
- Publish – if you tick the “publish” option, a notification will be sent to the employee(s) associated with the shift once the shift is saved.
*Tip: you can create a shift for multiple employees by selecting more than one employee in the “employee” selector from the shift edit panel. When you save the shift, a new shift will be created for each of the selected employees
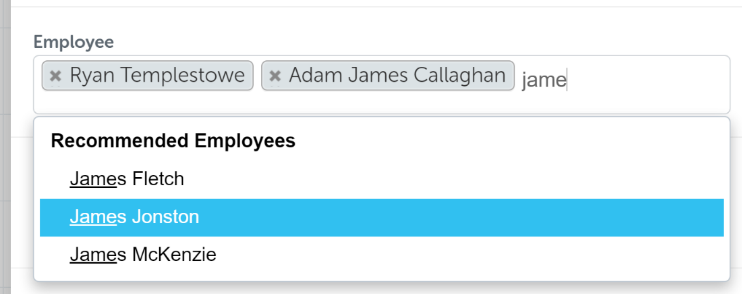
Once you have entered the details for a shift, click “Save” and the shift will be saved to the shift grid.
Editing a shift
To edit a shift, simply click on any existing unpublished shift in the roster grid. This will show the shift editor where you can make any changes to the shift and then save. Note: You cannot edit published shifts (see “unpublishing shifts”)
Moving shifts
You can quickly move shifts by clicking and dragging them to another shift tile. If you move the shift to another day, the date of the shift will be automatically updated. If you move the shift to another employee, the employee assigned to that shift will be updated automatically.
Deleting Shifts
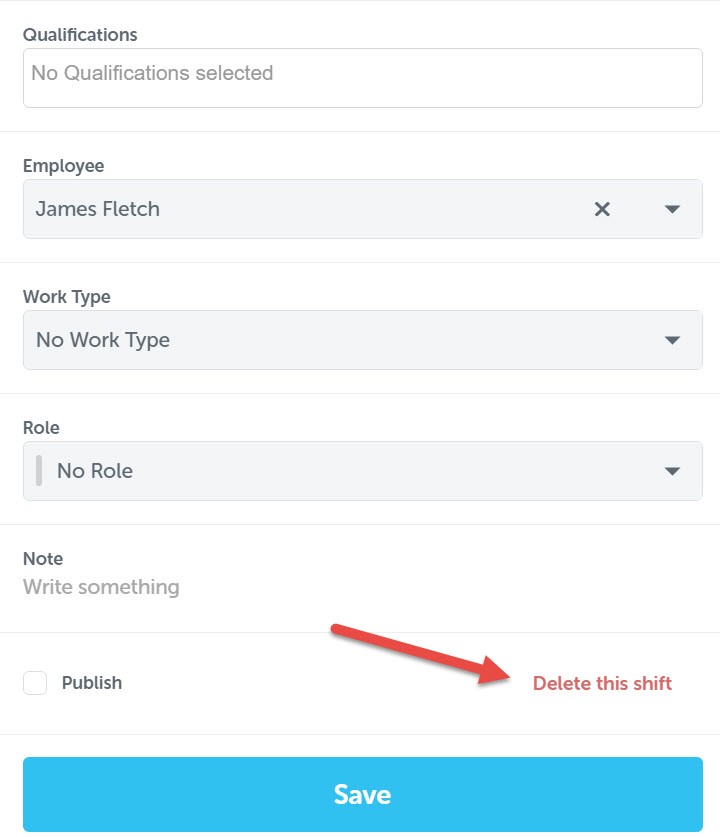
You can delete any shift that hasn’t been published (see here to unpublish shifts). Click on the shift that you want to delete, in the shift dialog that appears, click the “Delete” link.
Alternatively, delete all the unpublished shifts using the red Delete Shifts button.
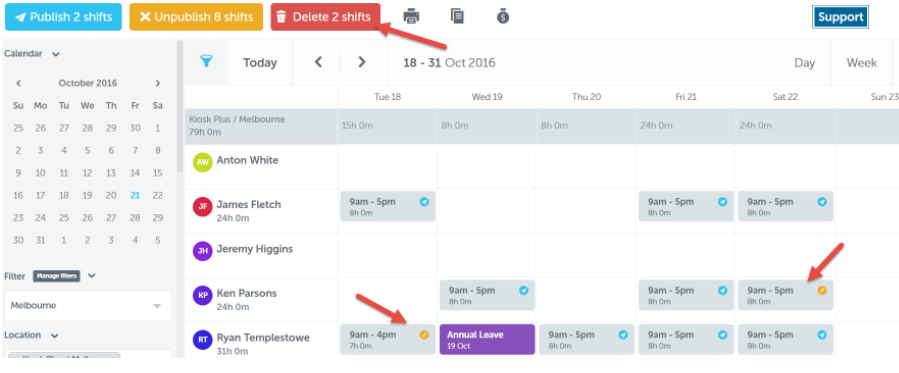
Deleted shifts are no longer visible on the roster calendar.
Copying shifts
- From the roster screen, click the “copy shifts” button to display the copy shifts panel
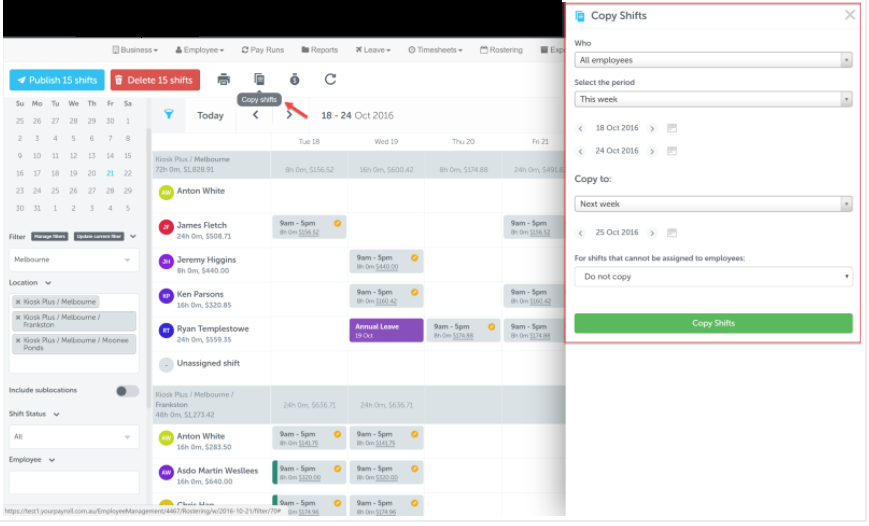
- From the copy shifts panel, you can select from the following options:
- Who – the employee(s) you want to copy shifts for
- The period – you can choose from a pre-selected date range or set a custom date range

- The date to copy the shifts to – this is the start date of the period that you want to copy the shifts to
- What you would like to do with shifts that cannot be assigned to employees
- Once you have selected your preferred options, click “Copy shifts” and your shifts will be copied.
Duplicate Shifts
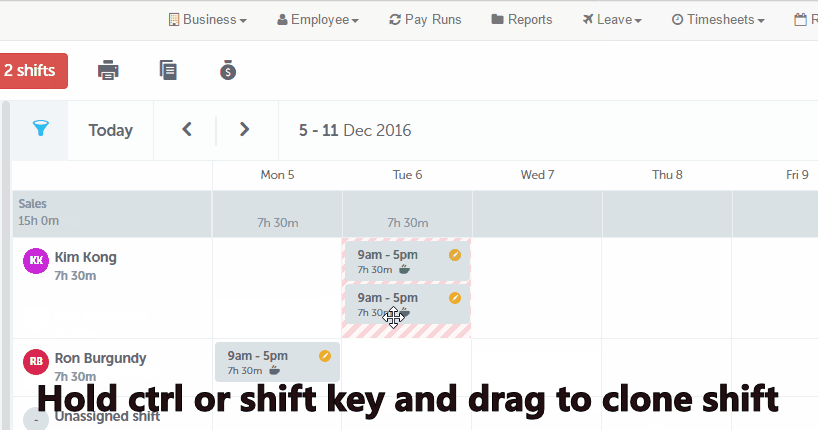
You can rapidly duplicate shifts by simply holding the CTRL or SHIFT key and dragging a shift to another employee or day.
Publishing Shifts
When you publish a shift, the following things happen:
- An email is sent to the employee letting them know that they have been assigned a new shift
- The shift becomes visible in the employee roster
- The shift is made read-only in the shift dialog
There are two ways to publish a shift:
- Publish an individual shift
- Bulk publish shifts
Publishing individual shifts
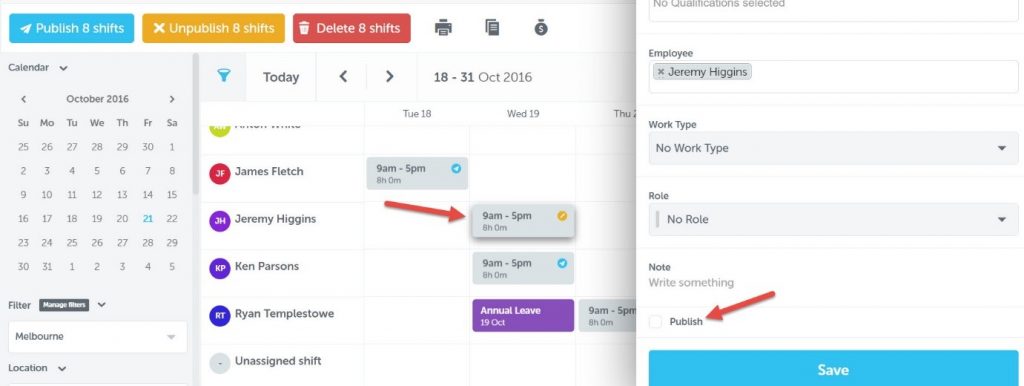
Click on the shift that you’d like to publish. In the shift dialog that is displayed, tick the “Publish” option then “Save” button.
Once you have done this, the shift will be published and the orange circle will change to blue on the employee roster.
Bulk publishing shifts
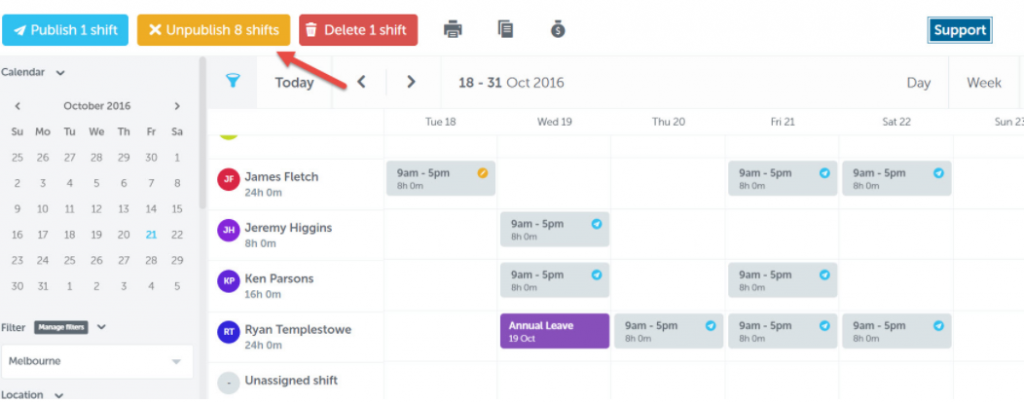
Click the blue “Publish XX shifts” button

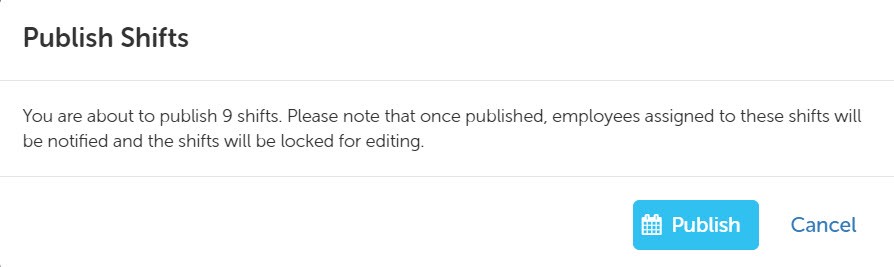
Confirm that you want to publish the shifts by clicking the “Publish” button in the shift publish dialog
Unpublishing Shifts
When you unpublish a shift the following things happen:
- A notification is sent to employees letting them know that they are no longer required to work the previously scheduled shifts
- The shift is no longer visible in the employee roster
- The shift can be edited in the shift dialog
There are two ways to unpublish shifts:
- Unpublish an individual shift
- Bulk unpublish shifts
Unpublishing an individual shift
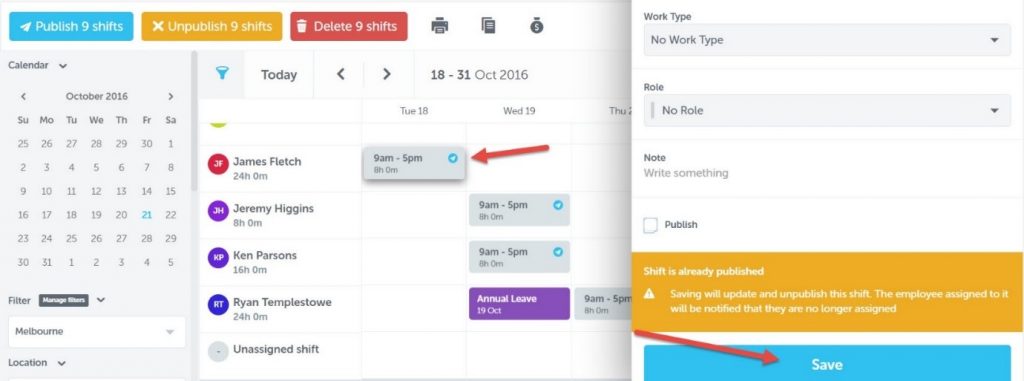
Click the shift you’d like to unpublish. In the shift dialog that is displayed, click the ‘Save’ button. There is a note explaining that the shift is already published, and saving it will update it and make its status “unpublished”
Once you have done this, the shift will be unpublished and the blue circle will change to orange on the employee roster.
Bulk unpublishing shifts
Click the orange “XX shifts to unpublish” button and then confirm to unpublish the shifts by clicking the “Unpublish” button in the confirmation dialog box
Once you have bulk unpublished those shifts, they will no longer be visible to employees in the employee portal and the circle will change from blue to orange in the employee roster.
Printing Employee Rosters
Once you’ve created an employee roster, you can print it out so that it’s easily accessible from within your workplace.
Printing an employee roster is made simple by the print specific view that allows you to easily print a nominated period of shifts based on your current filters and additional ones that can be selected before printing.
To print an employee roster, follow these steps:
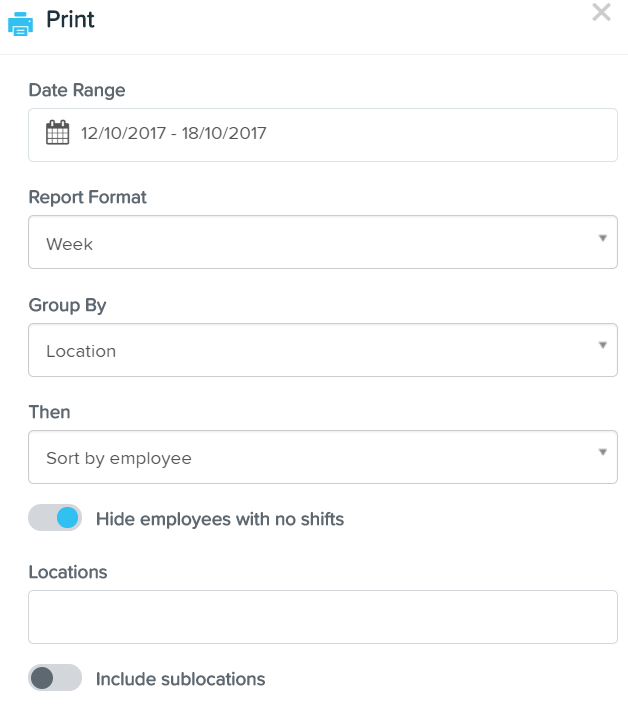
- Open your employee roster and apply any filters, then click the “Print” button:

- You are now able to print using range of filters and groupings. These include:- Date Range – Weekly, Fortnightly, Daily or a Custom Range- Report Format – Day or Week- Group By – Location or Business- Then Sort By – Employee, Role or Start Time- Option to Hide Employees with no Shifts- Filter by Location
– Option to include Sub Locations
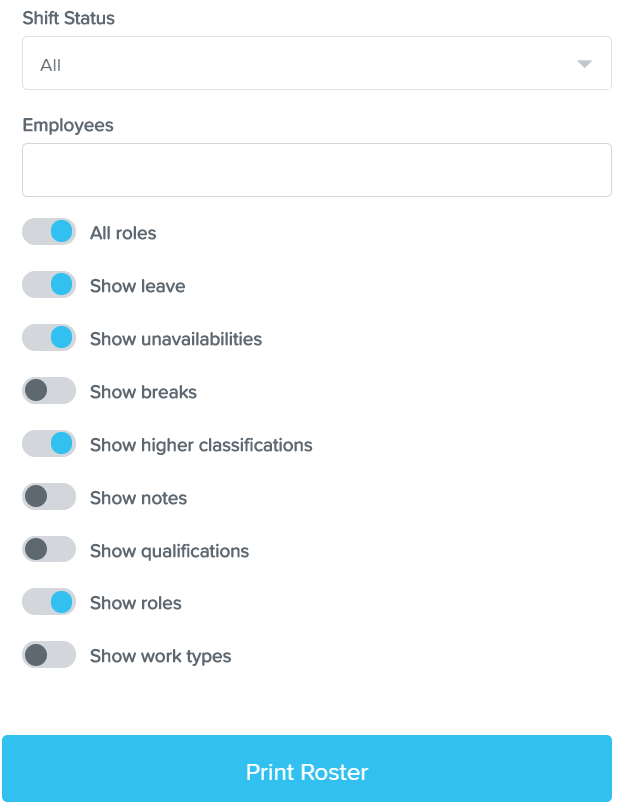
– Shift Status – All, Accepted, Published or Unpublished
– Filter by Employees
– Option to show/not show – Roles, Leave, Unavailability, Breaks, Higher Classifications, Notes, Qualifications, Roles, Work Types.
Once you have set the parameters you then click the “Print” button
You will then be presented with a print optimised view of the roster which you can then print out.