Roster Management: Budgets and Shift Costing
Roster Management: Budgets and Shift Costing
Contents
Setting a budget
The ability to use budgets in rostering is a handy tool, and allows you to track your wage costs against your budgeted costs.
- Click on the budget icon in the rostering screen. This will open the budgets panel:
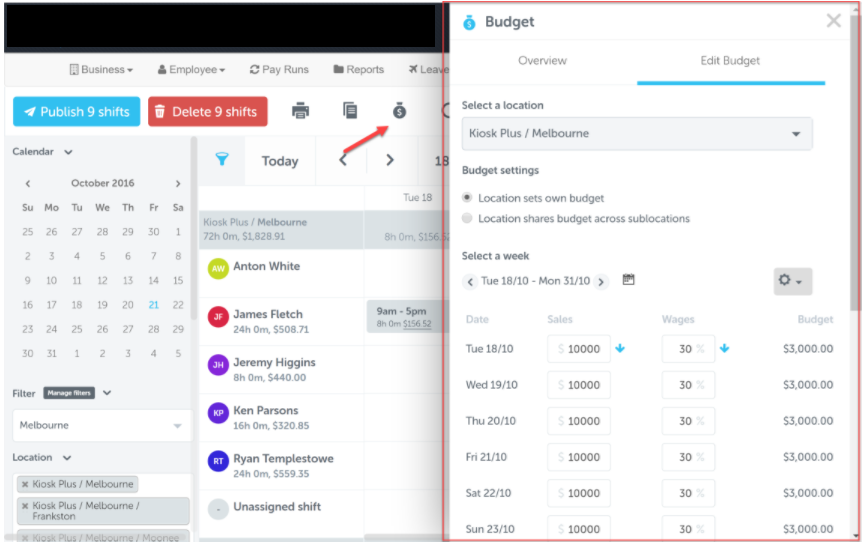
- From the budget panel you will be required to enter the following details:
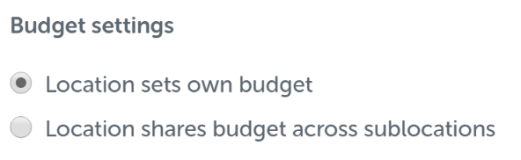
- Location sets own budget– use this setting when you want the budget to only apply to the selected location
- Location shares budget across sublocations– use this setting when you want to set a budget at the parent location and have it shared with all the sublocations of that locationNote- if you select the “Location shares budget across sublocations” option, you will not be able to set individual budgets for child locations
- Location – this is the location that the budget will apply to
- Budget setting – you can set the following options for a budget
- Week – the week that the budget applies to
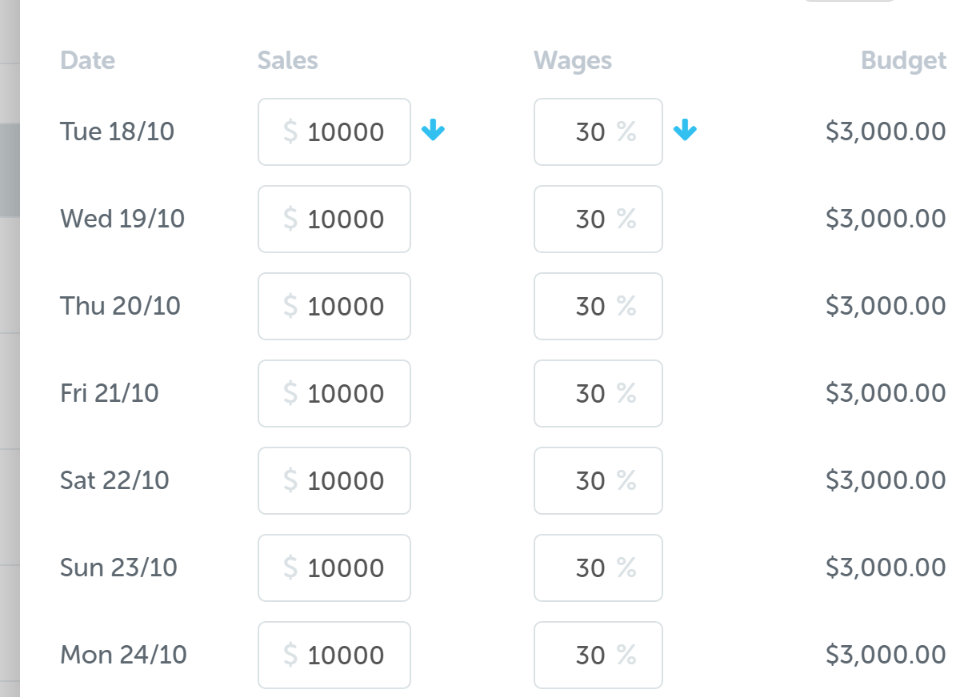
Once you’ve selected your budget settings, you can set your budget and sales figures for each day in the specified period
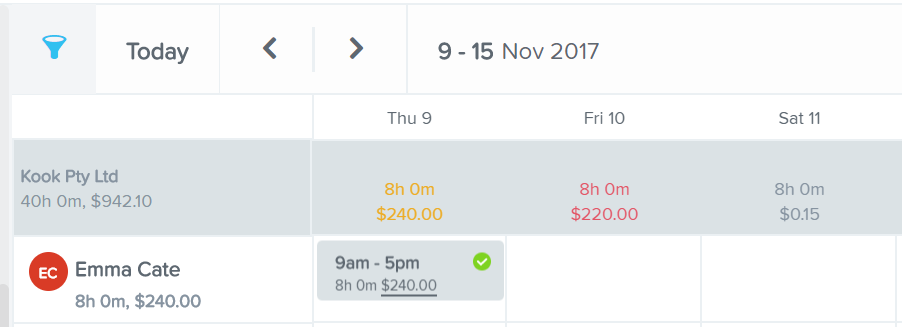
Once you’ve set your budget values, you can save your budget. Based on these values, you will notice in the roster that ORANGE means “the shifts have exceeded the budget warning level”, and RED means “over budget” (provided you have the ‘show costs’ button on). E.g. the below roster shows that the budget warning has been exceeded on the Thursday, the Friday is over budget, and the Saturday is within budget:

Additional budget settings
Within the budget panel you can find the following additional settings by clicking the budget cog:
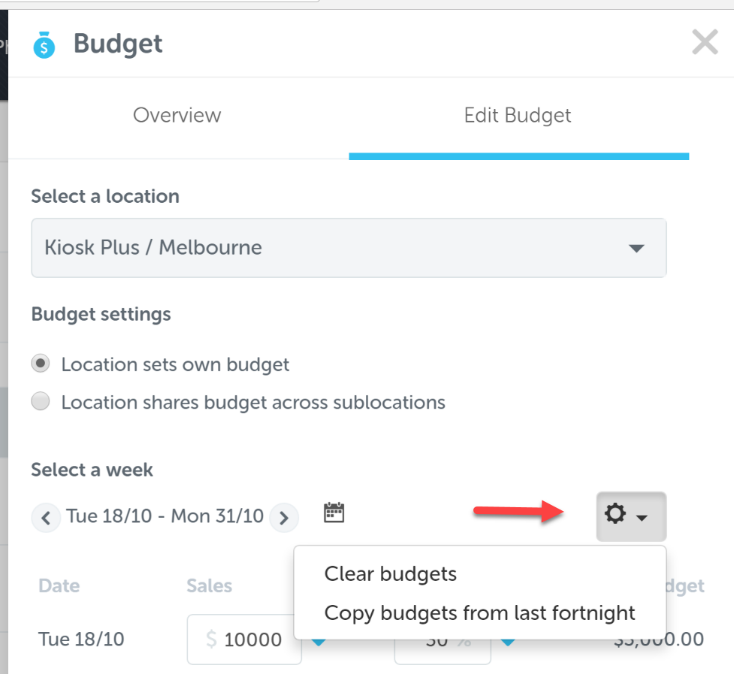
- Clear budgets – this will clear the budget values for the current period
- Copy budgets from last week / fortnight – this will copy the budget values from the previous week / fortnight
Viewing Shift Cost Summary
- Once you have set your budget you can view the shift costs vs budget by clicking on the header of any location
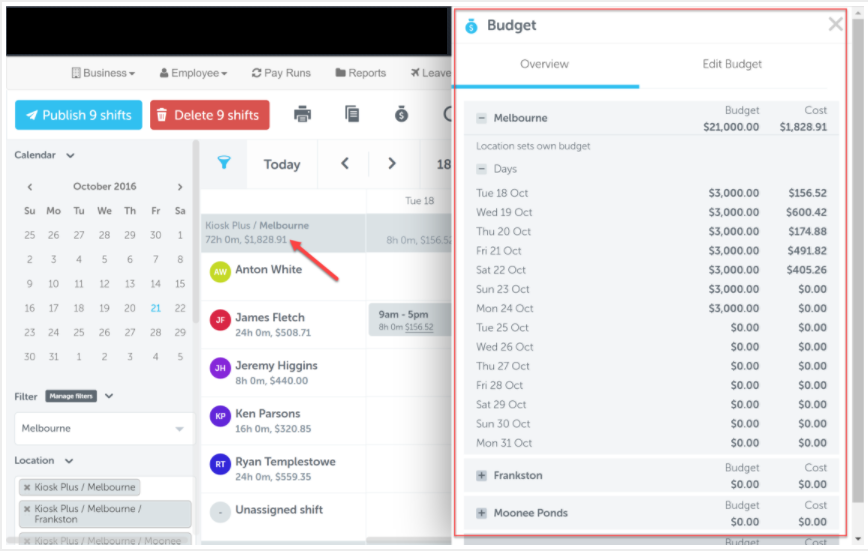
- In the budget overview screen, you can see a day by day breakdown of the budget and the costs of the shifts for each day
- In addition, if the budget is shared across locations, you can see the total costs compared to the budget in the totals section as well as see a cost break down for each individual location.
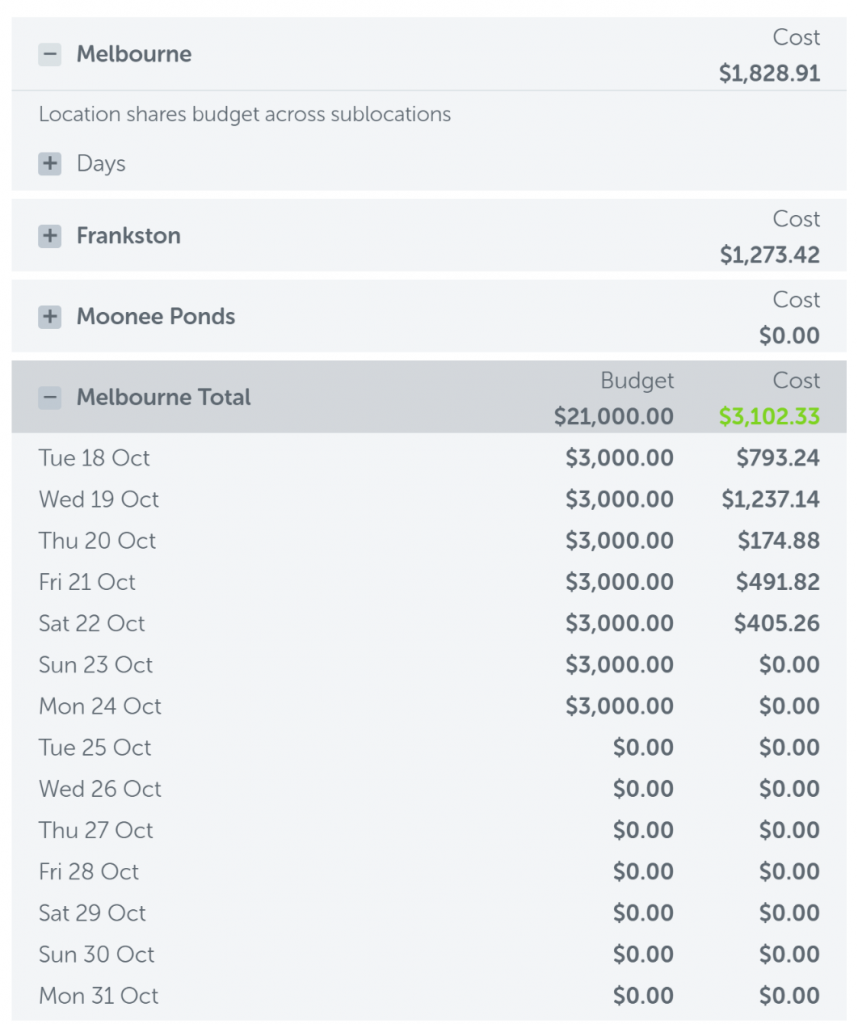
- You can also expand any individual location to see the day by day cost break down for each location

- Based on these values, you will notice in the roster that ORANGE means “the shifts have exceeded the budget warning level”, and RED means “over budget” (provided you have the ‘show costs’ button on). E.g. the below roster shows that the budget warning has been exceeded on the Thursday, the Friday is over budget, and the Saturday is within budget: